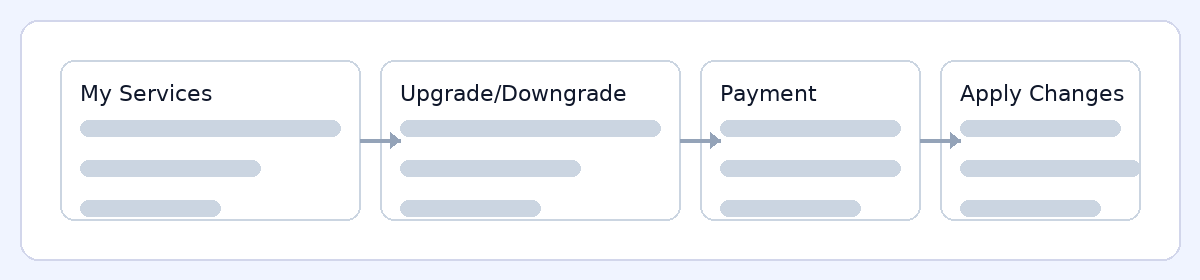
Steps
- Go to Client Portal → Services → My Services.
- Click your hosting service → Upgrade/Downgrade.
- Choose the new plan and confirm.
- Complete payment (proration may apply).
- Allow a few minutes for resource changes to apply.
What to expect
![]() Downtime: Upgrading typically has no downtime. Downgrading won’t take your site offline, but ensure your usage fits the lower plan’s limits first.
Downtime: Upgrading typically has no downtime. Downgrading won’t take your site offline, but ensure your usage fits the lower plan’s limits first.
![]() Proration: Charges/credits are prorated automatically and shown in your checkout before you pay.
Proration: Charges/credits are prorated automatically and shown in your checkout before you pay.
![]() Quotas after a downgrade: Verify your disk/database/inodes usage first. If you exceed the new limits, features like email or backups may pause until usage is reduced.
Quotas after a downgrade: Verify your disk/database/inodes usage first. If you exceed the new limits, features like email or backups may pause until usage is reduced.
![]() IP address: For plan changes on the same server, your IP usually stays the same. If a server move is required, we’ll coordinate with you.
IP address: For plan changes on the same server, your IP usually stays the same. If a server move is required, we’ll coordinate with you.
![]() Outgrowing Shared? Consider WordPress Hosting or VPS. We can migrate you—just open a ticket.
Outgrowing Shared? Consider WordPress Hosting or VPS. We can migrate you—just open a ticket.
Quick actions
 Upgrade now: Client Portal → Services → My Services → [Your Hosting] → Upgrade/Downgrade.
 Downgrade safely: Check usage first (cPanel → Resource Usage / Disk Usage) and remove excess backups/cache if needed.